Attention! Removing the carburetor is necessary for its complete disassembly or adjustment of the starting device.
Removing the air filter housing (see Removing the air filter housing).
Disconnect the wires from the solenoid valve and the limit switch connector (see Removing and checking the solenoid valve, Checking the economizer limit switch forced idling).
We remove the fuel hoses from the carburetor fittings, disconnect the air damper control cable from the sleeve on the three-arm lever (see Removing the carburetor fuel filter, Dismantling the carburetor on a car).

We disconnect the two hoses of the recirculation system from the carburetor fittings..

... and a vacuum supply hose to the vacuum ignition timing controller (bottom fitting).

We remove the thin hose of the crankcase ventilation system from the carburetor fitting.

Having unscrewed the screw of the carburetor heating unit with a Phillips screwdriver,..
... disconnect the unit along with the hoses.
If, due to severe corrosion of the threaded connection, it was not possible to unscrew this screw, loosen the tape clamps on the hoses and, having prepared a small container (0.4–0.5 l) to collect the coolant, remove the hoses from the heating unit.

Using a Phillips screwdriver, unscrew the screw securing the cable bracket..
... and take the bracket with the cable to the side.

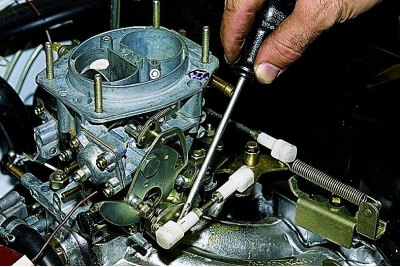
Prying off the tip of the carburetor throttle actuator transverse link with a slotted screwdriver, disconnect it.

We also disconnect the tip of the longitudinal drive rod from the lever.

Disconnect the return spring.

key «at 13» unscrew the four nuts securing the carburetor.

We remove the drive bracket with the lever and traction..

... and a carburetor.

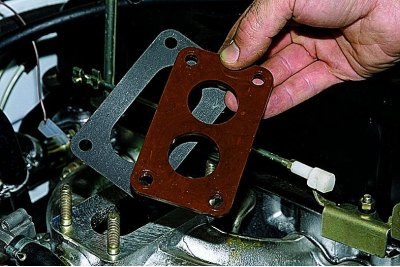
Carefully remove the gasket under the carburetor (with two holes),…

... as well as a heat-insulating spacer and a gasket between it and the intake manifold (with one hole).
It is advisable to close the hole in the intake manifold with a piece of tin or cardboard during the repair.
Install the carburetor in the reverse order, keeping the position of the gaskets (by imprint on them) or replacing them with new ones. Tighten the fastening nuts crosswise to the torque specified in Tightening torques for threaded connections. After installation, we check the adjustment of the throttle and air damper drive.
